Before migrating documents to MetaShare using the Migration Manager, the recommendation is to:
- Create a workspace configuration and give it a good name, e.g. “Archive”. Do not define any “Term set that defines suggested templates”:

- Do not select any content type in the workspace configuration’s submenu “Document content types”:

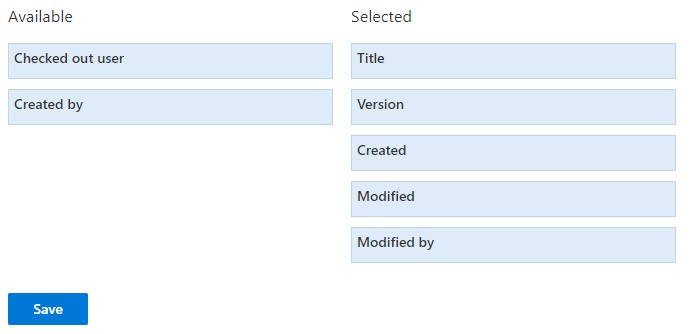
- In the workspace configuration’s submenu “Document columns”, select the columns you want to show in the document view, e.g.:
- In the workspace configuration’s submenu “Document filters”, select the filters you want to show in archive workspaces, e.g.:

- Create the workspaces that you need, for the migration, based on the newly created workspace configuration.
- If the workspaces will have more than 5 000 documents, you might want to index the columns that you will be presenting in these workspaces (document filters and/or document columns), so that these columns can be filterable and sortable. These are the columns that we recommend to index, where the “Modified” column is indexed by default:

- In order to restrict the users from adding or editing documents in the migrated workspaces, for each of the migrated workspaces, logged in as a site collection administrator, do the following:
- Open the workspace in SharePoint.
- Click on the “Settings” icon on the top right-hand side of the page and then “Site permissions”:

- Click on the “Advanced permissions settings” link:

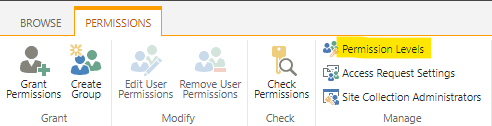
- In the Ribbon, click on the “Permission levels” link:
- Click on the “Contribute” permission level:

- Now you have two options:
- Easy option:
Restrict the permission of the built-in permission level “Contribute”. Use this option when migrating using the “Preserve file share or SharePoint permissions” option, as all users that have “Write” permissions on folders/documents in the source location, will get “Contribute” permissions on them in SharePoint. Unfortunately the users that have “Full control” permission on the source location will get “Full control” permissions on them in SharePoint and there is no way to modify this permission level, as it is read-only, so either you change the permission on the folders on the file server prior to the migration else these users will be able to modify these documents in the archive workspaces.- Un-check these two list permissions:

- On the bottom of the form, click on the “Submit” button:

- Un-check these two list permissions:
- More complex option:
Create a new permission level and apply the new permission to the Member’s group. Use this option when migrating without the “Preserve file share or SharePoint permissions” option, as no unique permissions will automatically be set during the migration. The advantage of choosing this option is that you are not modifying any of the built-in permission levels.- On the bottom of the form, click on the “Copy Permission Level” button:

- Give the new permission level a meaningful name, e.g. “Read and delete” and a suitable description:

- Un-check these two list permissions:

- On the bottom of the form, click on the “Create” button:

- Go back to Site permissions (step 4c above) and mark the site’s members’ group:

- In the Ribbon, click on the “Edit User Permissions” link:

- Unselect the earlier permission level and select the newly created permission level and click on the “OK” button:

- On the bottom of the form, click on the “Copy Permission Level” button:
- Easy option:
- Now you can commence your document migration to the migrated workspaces that you have created. A recommendation for you is to first do a test-migration to a test workspace, in order to:
- Analyze the file-migration speed. You should probably expect approximately 30 GB/hour, but the speed depends on your internet bandwidth and the performance of the computer where your agents are running. Based on the calculated speed, you will also be able to plan how long time the final migration will take. This information can be found in the “SummaryReport.csv” log-file, under these columns:”Total GB”, “Duration” and “GB/hour”.
- Analyze the migration error log-file (FailureSummaryReport.csv) to see if any of the documents could not be migrated.
- If you select the “Azure Active Directory lookup” option, verify that the documents’ “Created by” and “Modified by” columns are linked to known users. If they are broken you probably need to create and define a “User Mapping file“.