You can create a custom search results page, in SharePoint’s classic search results page, by following these instructions:
- Create a custom search results page:
- Login to Microsoft 365 and open the “Admin” app:

- Open the “SharePoint” admin center:
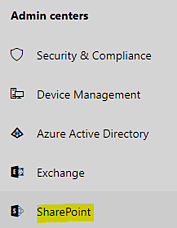
- Open “search” settings.
If you are using the Classic admin center you find it here: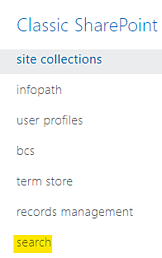
If you are using the Modern admin center, you will find it here:
- Open “Search Center Settings”:

- Copy the “Search Center URL” and open it in a new tab.

- Enter a search query and press enter or click the magnifying glass.

This will take you to the SharePoint’s default search results page.
You should not edit this page, as it might be used somewhere else within the organisation. You should instead create a new search page customized with your needs. - Click on the “Settings” icon and select “Site contents”:

- Open the “Pages” library:

- Create a new custom search page, by clicking on “New” in the toolbar, and selecting the “Page” option:

- Give the page a meaningful “Title”, a “URL Name” and select “(Welcome Page) search results”, as “Page Layout”:

- Click on the “Create” button.
- Login to Microsoft 365 and open the “Admin” app:
- Customize the “Refinement” web part:
- Open the newly created custom search page.
- Edit the page by clicking on the “Settings” icon and then selecting the “Edit page” option:
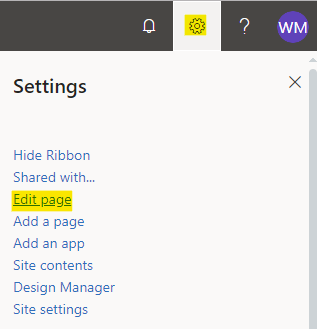
- Edit the “Refinement” web part, on the left side of the page, by hovering over the arrow next to the web part’s name and then selecting the “Edit Web Part” option:
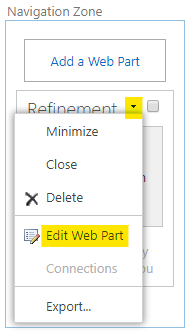
- In the web part’s property form, on the right-hand side of the page, click on the “Choose Refiners” button:

- Remove the default refiners, by selecting them and clicking on the “Remove” button and add the refiners that you earlier mapped, when configuring your managed properties, by selecting them and clicking on the “Add” button:

For a reference to the refiners’ names, use the spreadsheet that you earlier created and sort them in the order they should be presented, as defined in the spreadsheet.
If you add more than 10 refiners, you will get a warning that it might decrease search performance. It is however quite safe to add more than 10, but not more than 20, which is the maximum number of refiners.
For each of the refiners: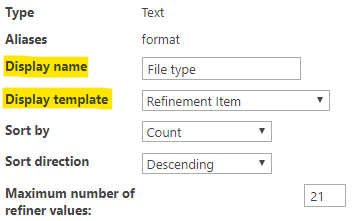
- Give them a “Display name” (the name that the refiner will have on the search results page, preferably the same name as the column’s display name).
- Select a “Display template”.
- The default and recommended options is to choose “Refinement item”, where users can refine on just one value:

- If the users want to be able to refine on multiple values in a refiner then choose “Multi-value Refinement Item”:

- If the metadata column is a date, then the “Slider with bar graph” is a good option:

- The default and recommended options is to choose “Refinement item”, where users can refine on just one value:
- Click on the “OK” button.
- Save the modified “Refinement” web part by clicking on the “OK” button in the web part properties panel.
- Customize the “Search Navigation” web part:
- Edit the “Search Navigation” web part, by hovering over the arrow next to the web part’s name and then selecting the “Edit Web Part” option:
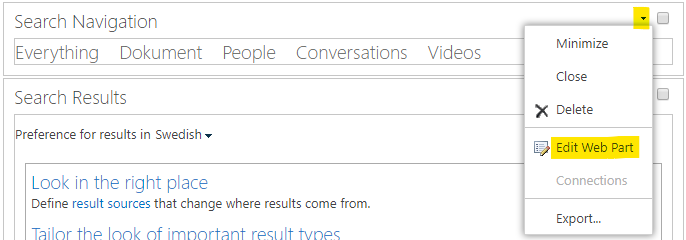
- Click on the “Search Settings page” link:
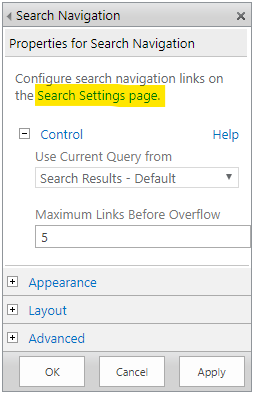
A new tab opens up with the title “Site Settings : Search Settings”. - On the “Configure Search Navigation” section, click on “Add Link”:

- Enter the “Title”, e.g. “Documents” and the “URL” (the address to the newly created search results page) and click on the “OK” button to return to the page:

- Select the new search navigation and click on the “Move up” icon to move it up where it should be, e.g. under the Everything option:

- Click on the “OK” button, on the bottom of the page.
- Close the tab and return to the custom search results page where you save the modified “Search Navigation” web part by clicking on the “OK” button in the web part properties panel.
- Edit the “Search Navigation” web part, by hovering over the arrow next to the web part’s name and then selecting the “Edit Web Part” option:
- Customize the search results web part. The search results web part is used to restrict/filter the results on the custom search results page, e.g., the link to “People”, needs to show up only results related to users. For the current scenario we need to restrict the Documents link. Do the following:
- Edit the “Search Results” web part, by hovering over the arrow next to the web part’s name and then selecting the “Edit Web Part” option:

- Edit the web part and click on Change Query:

- See to it that your query is in “Advanced mode” (you should see “Switch to Quick Mode” on the page:

- Replace the standard “Query text” in the multi line box:

with this string:(IsDocument:"True" OR contentclass:"STS_ListItem") -FileType:aspx -ParentLink:/SiteAssets/ (-ContentTypeId:0x0120* OR ProgID:OneNote.Notebook) {SearchBoxQuery}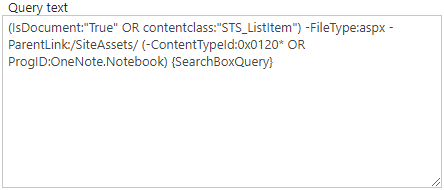
- By default, SharePoint removes all duplicate documents from the search page. To avoid this behavior, switch to the “SETTINGS”, and select the entry “Don’t remove duplicates”:

- Click on the “OK” button on the form to save the changes.
- Save the modified “Search Results” web part by clicking on the “OK” button in the web part properties panel.
- Edit the “Search Results” web part, by hovering over the arrow next to the web part’s name and then selecting the “Edit Web Part” option:
- Save, check in and publish the page by first clicking on the “Check it in” link on the top of your page:

and once it is checked in, the click on the “Publish it” link:
- Your custom search results page is now created and is ready to use. It now has:
- The defined refiners on the left of the page
- The “Documents” scope
- And the results should only show documents
- Copy the path to the created custom search result page and paste it into the “SharePoint’s search result page” field in MetaShare’s general settings page and click on the “Save” button:

Discover MetaShare
Metadata-centric document management system in Microsoft 365/SharePoint
- Eliminates annoying gaps in standard SharePoint
- Ensures data in SharePoint is well structured
- Structures with metadata instead of storing in traditional folders
- Centralized and simplified administration
- Orchestration/provisioning of settings
- Refined Enterprise search