Here you find instructions on how to migrate documents from a file share using SharePoint Migration Manager.
- Before migrating your file share you can scan the share to get a report of any possible warning or error. Follow these steps to scan the file share:
- Open SharePoint admin center, click on Migration and under the Migration Manager option, click on the “Get started” button:

- Select the “Scans (Preview)” tab and click on the “Add source path” function in the toolbar or the button on the bottom of the page:

- Add the “Source path” in UNC format and click on the “Add” button:

If you select the option to “Add all subfolders as source paths” you will later easier be able to remove subfolders from the migration. - Once the scan has been conducted you will get an overview of the scan:

And from here you can click on the customize filter option and choose to only see the results that have errors or warnings:
You can from the results list choose to download a “Scan Log” and a “Summary report”, for further information and actions to do prior to starting the migration.
- Open SharePoint admin center, click on Migration and under the Migration Manager option, click on the “Get started” button:
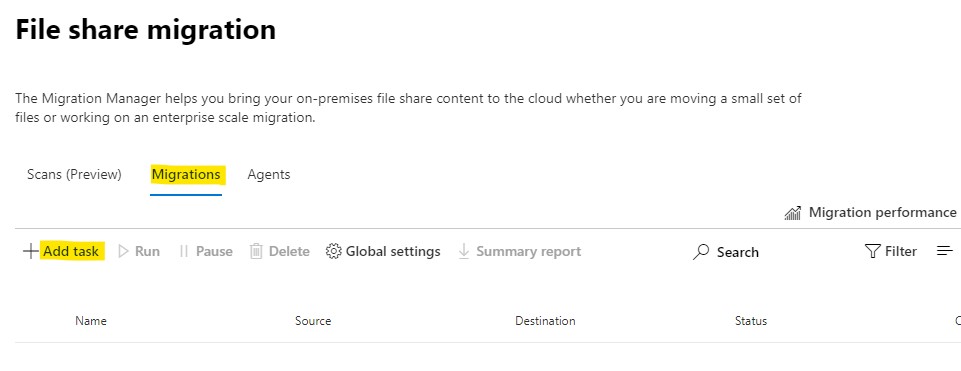
- When you are ready to migrate, Select the “Scans (Preview)” tab and click on the “Add source path” function in the toolbar:
- In the “Pick method” step, you can now choose to do a single source and destination migration or to do a bulk migration:
 To do the bulk migration, you first need to create a JSON/CSV file for the migration. In this instruction we are only explaining the “Single source and location” option. To proceed click on the “Next” button.
 - In the “Select source” step, paste the path to the folder where the documents that you want to migrate are located and then click on the “Next” button:

- In the “Select a destination” step, select SharePoint and click on the “Next” button:

- In the “Select a SharePoint site destination” step, paste the path to the site where the documents will be migrated to. After validating the path, select a library where the documents will be migrated to, in the case of a MetaShare workspace, select “Documents”. When done, click on the “Next” button:

- In the “Settings” step, give the migration task a meaningful name and then open the “All settings” option:

- The options that you can now choose before you click on the “Run now button” are:

- Perform scan only: This option will not conduct any migration just a scan, like in step 1 above.
- Preserve file share permissions: If you enable this setting then the destination document library will inherit the permissions that have been set on the file server. The migration tool will then, in the beginning of the migration, break the destination library’s permission inheritance and remove all permissions on the library. During the migration it will however add whatever permissions the source root folder has, but only if the folder does not inherit permissions from its parent folder. Documents without any specific permission in the source will inherit the permissions from the target library. Migrated files with unique permissions in the source will carry over these permissions to the destination, as unique. Read this page for more information about the outcome of the file permissions, when using this setting. To keep the same permissions on the document library’s root folder, as are defined in the site, a recommendation is to stop the permission inheritance for the library before migrating the documents. The library will still get the same permissions as are set on the site:
– The “Owners” SharePoint group will still have “Administrate” permissions on the site
– The “Members” SharePoint group will still have “Contribute” permissions on the site
– The “Visitors” SharePoint group will still have “Read” permissions on the site
This is how you stop inhering the permissions on the document library:- If you want to restrict the Members from adding or editing documents in the migrated workspace and you haven’t already performed step 7 in these instructions, How to prepare MetaShare for migration, then do this first, before you continue with the next steps below.
- Open the workspace’s SharePoint site.
- Open the document library’s settings by clicking on “Site contents” on the left navigation, then clicking on the ellipsis (three vertical dots) and selecting the “Settings” option:

- Under the “Permissions and Management” section, click on the “Permissions for this document library” link:

- On the ribbon, click now on the “Stop Inheriting Permissions” function

You will be asked to confirm that you want to create unique permissions for the folder, click on the “OK” button:
- Migrate hidden files: The recommendation is that the setting is set to Off, disabling hidden system files to be migrated.
- Migrate files created/modified after: A recommendation is to maybe only migrate documents that have been modified the last 10 years but this, of course, is depends on your business needs.
- Do not migrate files with these extensions: Typically, these file extensions are excluded: .ds_store, .db, .ini, .tmp, .exe and .dll. Each file-extension should be separated with a colon, and the input-string would then look like this:
:ds_store :db :ini :tmp :exe :dll - Replace invalid file name characters with: A recommendation is to enable this and add an underscore “_” as the replacement character.
- Migrate OneNote folders as OneNote notebooks:
We do not see any reason why not to allow migration of OneNote folders. - Azure Active Directory lookup: If you select this option, the recommendation is to check that the documents’ “Created by” and “Modified by” columns will be linked to known users. If they are broken, you probably need to create and define a “User mapping file“:
- User mapping file: If you choose to use a custom user mapping file and want to preserve user permissions, turn off Azure Active Directory lookup. By doing so, if a user isn’t found in the mapping file, the tool won’t look it up in AAD.
- Automatic rerun failed tasks up to 4 times:
We do not see any reason why not to rerun failed tasks.
- Once the migration has completed you will see a summary report of the migration, with the option to open the log files (there are several log files out of which the migration error log file, FailureSummaryReport.csv, is the most important).
- After a migration task has completed you will also be asked if you want to save the migration job so that you at a later time can rerun the migration, allowing you to migrate only new or updated files in the source location.
- If your migrated workspace has more than 5 000 documents, you might want to index the columns that you will be presenting in these workspaces (document filters and/or view-columns), so that these columns can be filterable and/or sortable. Something to know about large workspaces is that you cannot change the permissions on the library if it has more than 100 000 documents. If you need to change permissions you will first have to delete documents so you have less than 100 000, change permissions and then restore the documents from the recycle bin.