Available user roles in MetaShare
There are a few roles that grant you different privileges in MetaShare. The roles are defined as Entra ID application roles that are managed from your Azure Portal. Any user must have at least one role. If you have the necessary Microsoft 365 licenses, roles can also be assigned to groups.
Security administrator
Can manage security settings in MetaShare. Today, that is what users and groups are assigned as site collection administrator to SharePoint site collections created by MetaShare.
Recommended
It is strongly recommended that you assign a service account as Site collection administrator and a security group as Secondary site collection administrator in MetaShare’s security setting after activation.
This way you will not overshare with the global administrator that activated the app (that automatically becomes the site collection administrator in MetaShare workspaces) and you can easily manage administrative access to workspaces using security groups.
Caution!
Site collection administrator is the highest permission level within a SharePoint site. This should only be used for troubleshooting or advanced custom settings. To manage access to a workspace, it is enough to assign users to the Owners group in the SharePoint site, that has more limited permissions.
Content administrator
To access MetaShare’s settings and there be able to configure MetaShare (normally just a few individuals per organisation should have these access-rights), the users need to be assigned the “Content Administrator” role. Users with this role will get the settings-icon, when they are in MetaShare’s start-page (MetaShare Workspace Manager):![]()
Workspace creator
To be able to create MetaShare workspaces, the users need to be assigned the “MetaShare Workspace Creator” role. Users with this role will get the “New workspace” function in the toolbar of MetaShare’s start-page (MetaShare Workspace Manager):
MetaShare user
To be able to use MetaShare, as an end-user, without assigning any other roles, users need to be assigned the “MetaShare User” role.
How to assign roles
The user that activated MetaShare in your Microsoft 365 tenant has automatically been assigned the “Content Administrator” and the “Workspace Creator” roles during the sign-up process. For other users that should have these roles you need to assign the roles in Microsoft Entra ID by following these instructions:
- Go to Azure Portal.
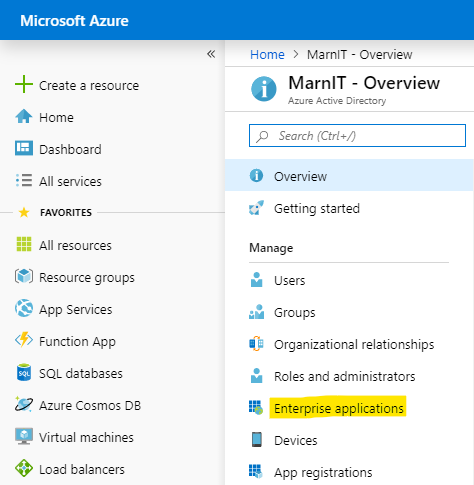
- In the left navigation, click on “Microsoft Entra ID“:
- Click on “Enterprise applications“:
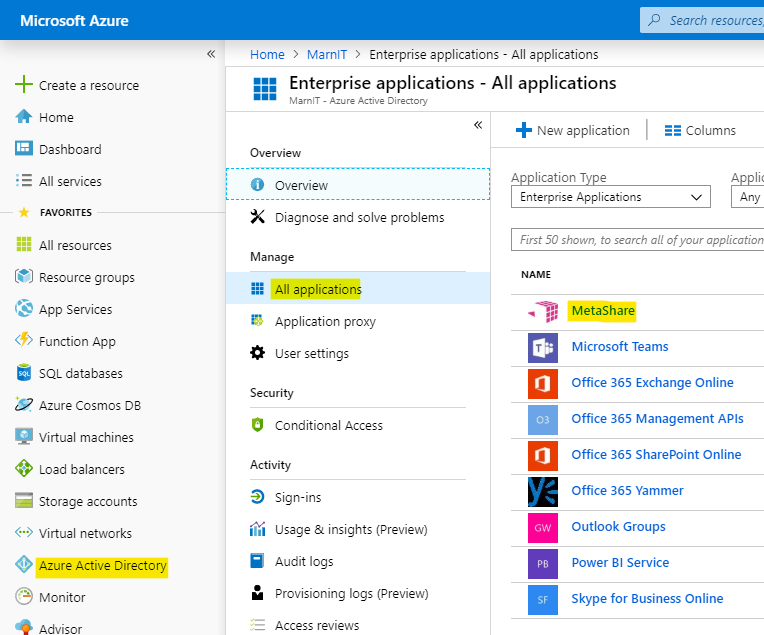
- Click on the “MetaShare” application:
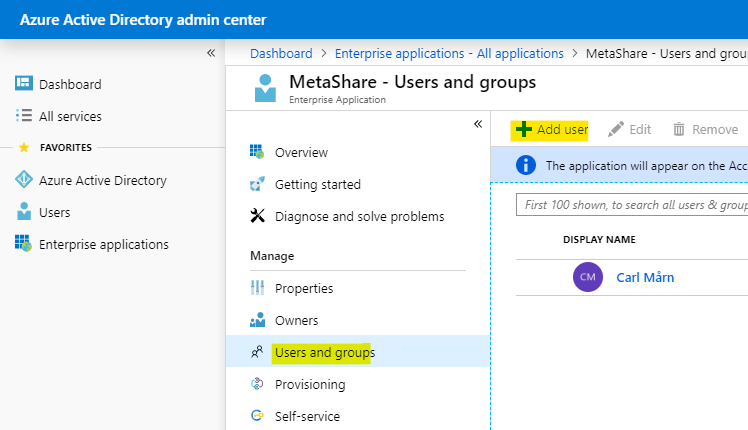
- Click on “Users and groups” and then “Add”:
- In the “Users and groups” blade, search for the user you want to assign to a role and when found, click on the name. It will then be displayed in the “Selected members” section, where you can add multiple users before you click the “Select” button:
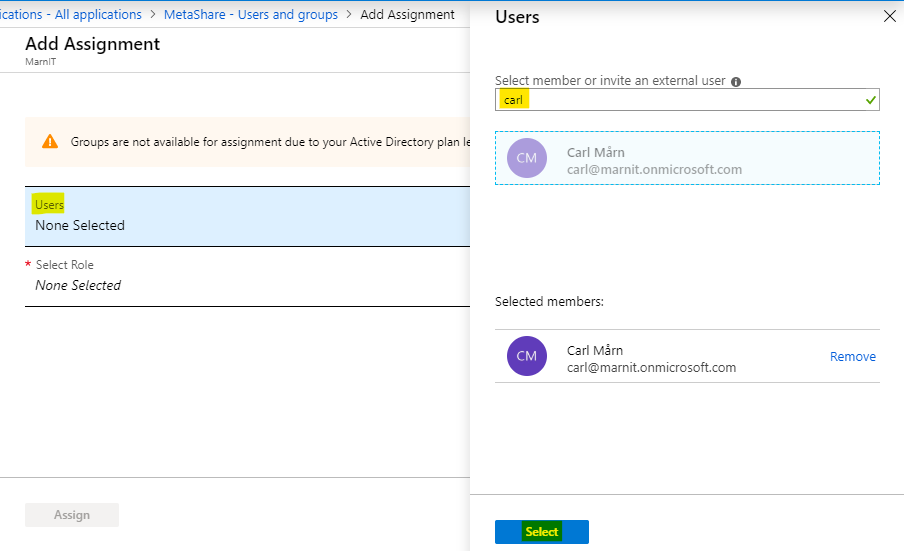
If you have Entra ID Premium you can assign security groups instead of individual users. - Click on the “Select Role” blade and click on the role that you want to assign the users to (unfortunately you will not be able to select multiple roles, unless you have an Microsoft Entra ID premium licence) and then click the “Select” button:

- Review you choices and click on the “Assign” button:

- The assigned users must log out and in again from MetaShare to get their new assigned privileges.
Once users have been assigned any of the MetaShare roles, follow these instructions to pin the MetaShare app to Microsoft 365’s app launcher.