Activating MetaShare does not take more than a few minutes.
The prerequisite for activating MetaShare is that you have access to Microsoft 365. For a list of all supported Microsoft 365 subscriptions, see MetaShare Service Description. If you are unsure which subscription you have, click here and if you want to get a free Microsoft 365 trial account, click here.
When you activate MetaShare:
- You must login with an Microsoft 365 account with the Global Administrator role. It must not be a guest account.
- If you don’t have access to such an account, someone else, with this permission, must assist in activating MetaShare for you.
- Information about the accounts and permissions that are required for activation, configuration and administration of MetaShare can be found here.
If you do not yet have contact with anyone from the MetaShare team, please fill in the fields on one of these forms and, within short, someone from the MetaShare team will supply you with a link to activate MetaShare and guide you through the MetaShare activation and configuration process:
Before activating MetaShare we would like to make you assure that a MetaShare activation does not do any changes to any of your existing sites in SharePoint. You can safely activate MetaShare and later deactivate it without any risk.
For a quick reference on how to activate MetaShare, watch this video:
Or read the following steps to understand what the activation actually does:
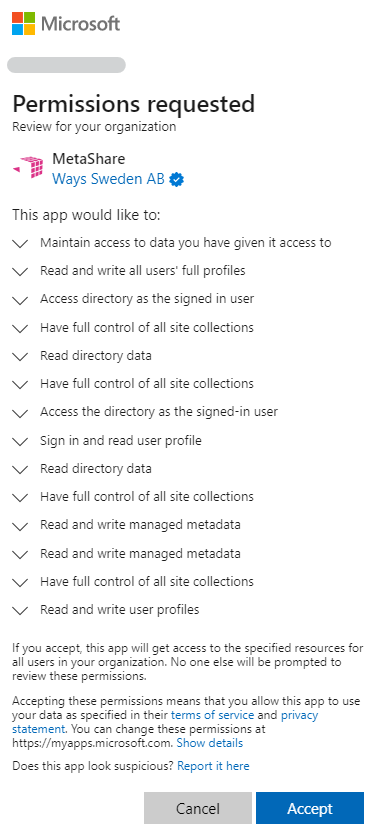
- The first thing you need to do, when activation MetaShare, is to approve that MetaShare is granted appropriate SharePoint permissions in order to perform tasks such as: upload documents, create documents, search for documents and create workspaces. The permissions are granted by clicking on the “Accept” button on the form below:

MetaShare will now be added as an Azure app, in your Azure portal:
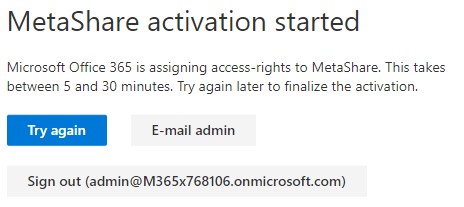
- After clicking on the “Accept” button, in the permission request page, you will most probably get this message:

This is due to latencies in setting appropriate permissions in Azure and you might have to wait for about 30 minutes. Click on the “Try again” button every few minutes and once the permissions have been set you will be directed to the first step of MetaShare’s activation wizard:
On the top of the page, you see some information about your Microsoft 365 tenant. This information will be stored in MetaShare’s internal database in Azure, in order to keep track of MetaShare users. The logged in user will be set as the MetaShare administrator, but can be changed to any account after the activation. On the bottom of the page you can choose to add some sample data/terms as well as sample columns and content type (currently available in English and in Swedish). - If you do not choose to add the sample data before clicking on the “Continue” button, then you will jump directly to step 4, else this is what you will have to do:
- If you do not have appropriate permissions to SharePoint’s term store, a message will be shown under the “Continue” button prompting you to add yourself as a term store administrator:

To add yourself as an administrator, just click on the “Term Store” link in the message. A new browser tab will open where you can add yourself as one of the “Term Store Administrators”:
After having assigned yourself the permission, just close the tab and click again on the “Continue” button. - This will lead you to the next step in the activation, to manually publish the document content type that was created in the previous step:

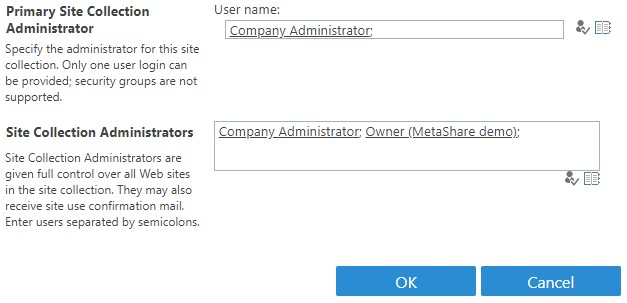
If you get an “Access denied” message after clicking the “Publish” button, you first need to add yourself as a site collection administrator in the Content Type Hub, by clicking on the “Content Type Hub” link. A new browser tab will open where you can add yourself as one of the “Site Collection Administrators”:
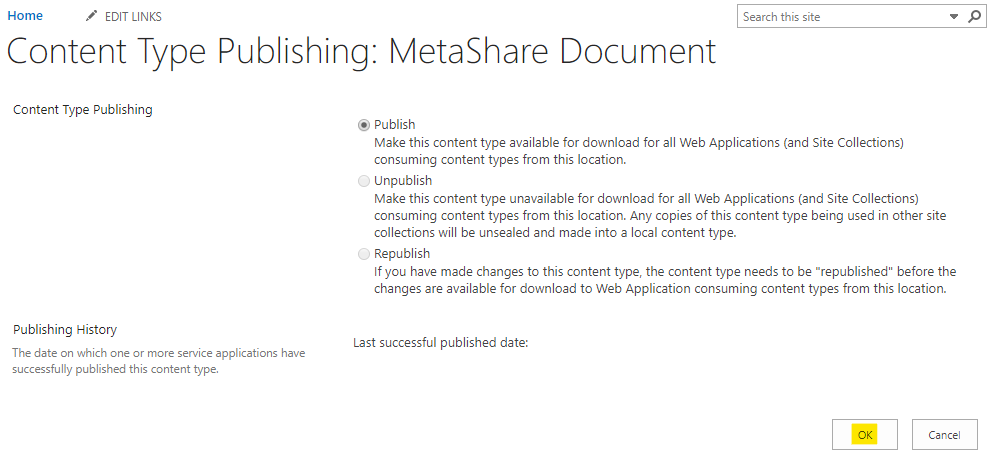
After having assigned yourself the permission, just close the tab and click again on the “Publish” button. A new browser tab will open where you publish the content type by clicking on the “OK” button:
After publishing the content type you can just close the content type tab and go back to the activation page.
- If you do not have appropriate permissions to SharePoint’s term store, a message will be shown under the “Continue” button prompting you to add yourself as a term store administrator:
- In the next step you just need to click on the “Continue and finalize” button:

- You will now have to login again and will be asked to give your end-users access to MetaShare, with the same permission consent as before:

- You should now come to MetaShare but as your logged in token does not yet have the necessary credentials you will come to this page:

You will have to logout and login again, to get your new session token, and then get to an empty MetaShare’s start page:
- You can now create a workspace, based on the sample information model’s workspace configuration or you can first configure MetaShare and then create your workspaces.
Note
- If you try to access MetaShare before you have activated MetaShare you will come to this page:
